Turn 3D and architectural renders into photorealistic images
Upload an exported interior, exterior, or architectural render and replace the flat CGI finish with natural materials, believable light, and camera-like depth while keeping the original design recognizable.
JPG, PNG, WebP · up to 20MB each · 5 credits per image0/1 images
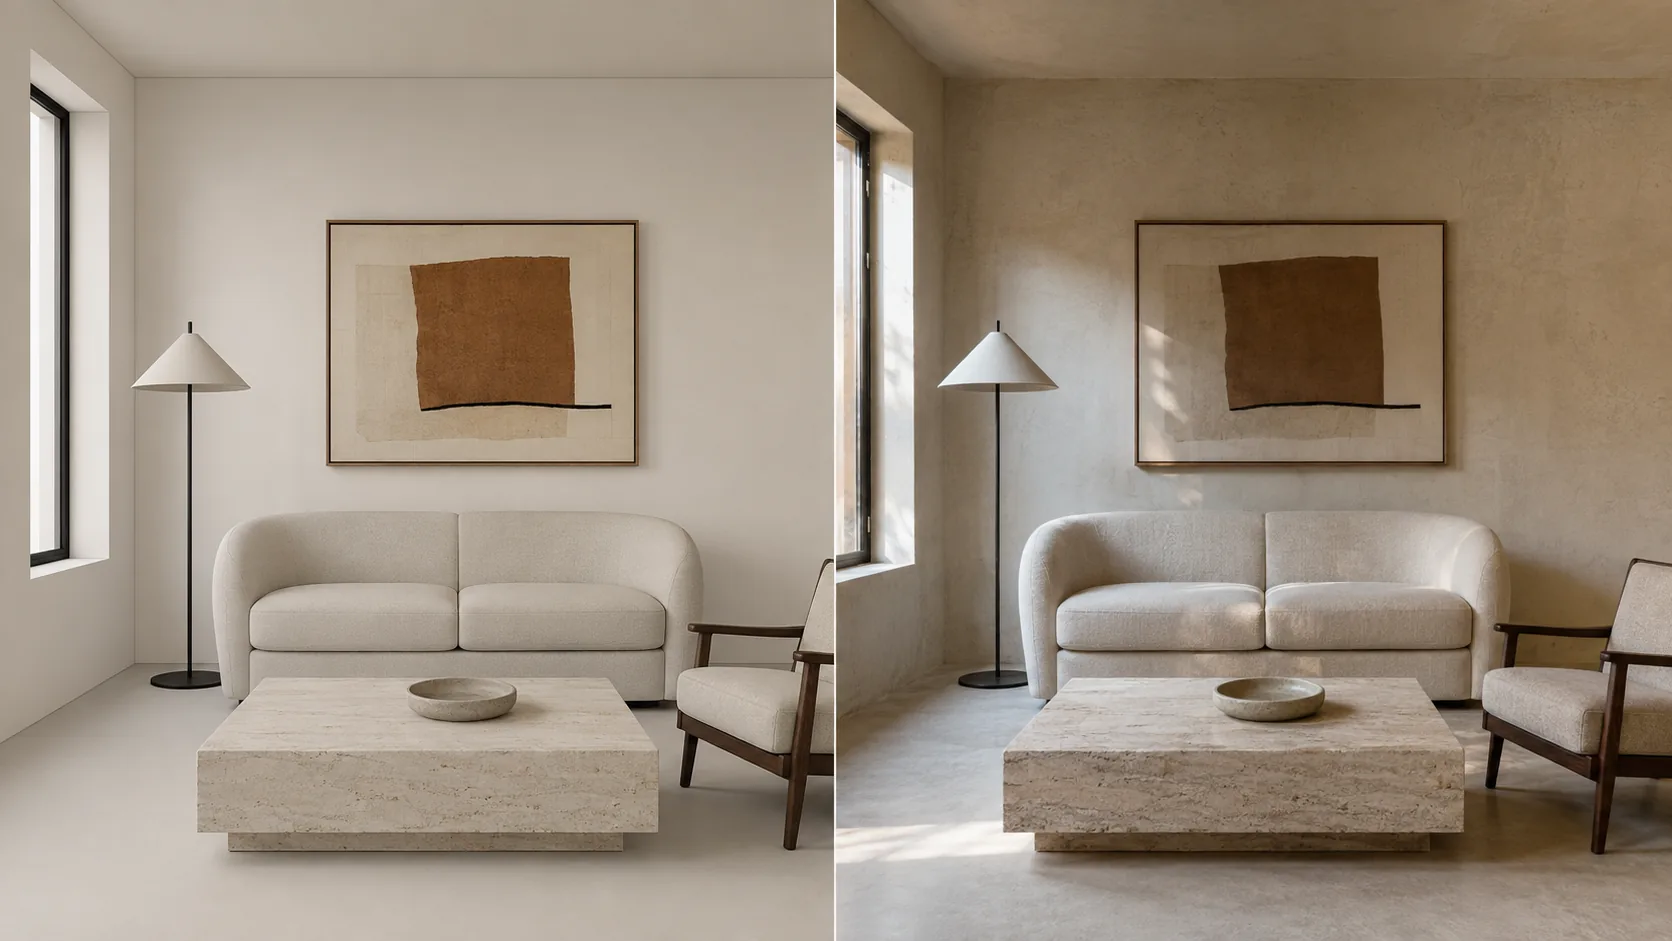
3D renderPhotorealisticThe same room, with a more photographic finishGeometry and framing stay aligned while natural material variation, window light, contact shadows, and atmosphere replace the uniform CGI finish.
Geometrykept recognizable
Materialsmade more natural
Lightingmade photographic
Render-to-photo realism
Improve the render finish without replacing the design
This workflow is for an existing 3D or CG render whose composition already works. AI concentrates on the photographic cues that still make the image look computer-generated.
Start with an exported render image
Convert the view you have—not the 3D project file
This page works from an interior or exterior image exported by your 3D or rendering software. It uses the visible composition as its reference and brings the CGI finish closer to a photograph.
SketchUp image exportsRevit image exportsBlender renders3ds Max rendersV-Ray rendersLumion or Enscape images
Upload a JPG, PNG, or WebP image. The converter does not open native SketchUp, Revit, Blender, CAD, or other 3D project files.
A focused render conversion
Keep the useful render; rebuild the visible CGI cues
The goal is not to generate a new architectural proposal. It is to improve the parts of the existing render that still reveal a synthetic image.
01
Keep from the source render
The existing image remains the reference for the project and camera view.
Architectural geometry and spatial relationships
Furniture, openings, and object placement
Camera angle, perspective, framing, and crop
Overall material palette and design direction
02
Rebuild for photographic realism
The conversion focuses on the finish that makes a render feel synthetic.
Flat CGI lighting and weak contact shadows
Plastic surfaces and uniform material texture
Unnatural glass, reflections, and highlight behavior
Render-like sharpness, empty depth, and missing scale cues
How it works
Convert an exported 3D render in three steps
No 3D scene file or complex prompt is required. Add the current render image, apply the architectural realism pass, and compare the photographic finish.