
Matcha trend filter
Matcha Trend Filter: Give Your Photos the Green Look
Use the Matcha Trend Filter to add bold yellow-green pixels, posterized tones, and liquid-like distortion to your photo. Upload an image, keep the subject recognizable, and create a green-toned edit for your next post.
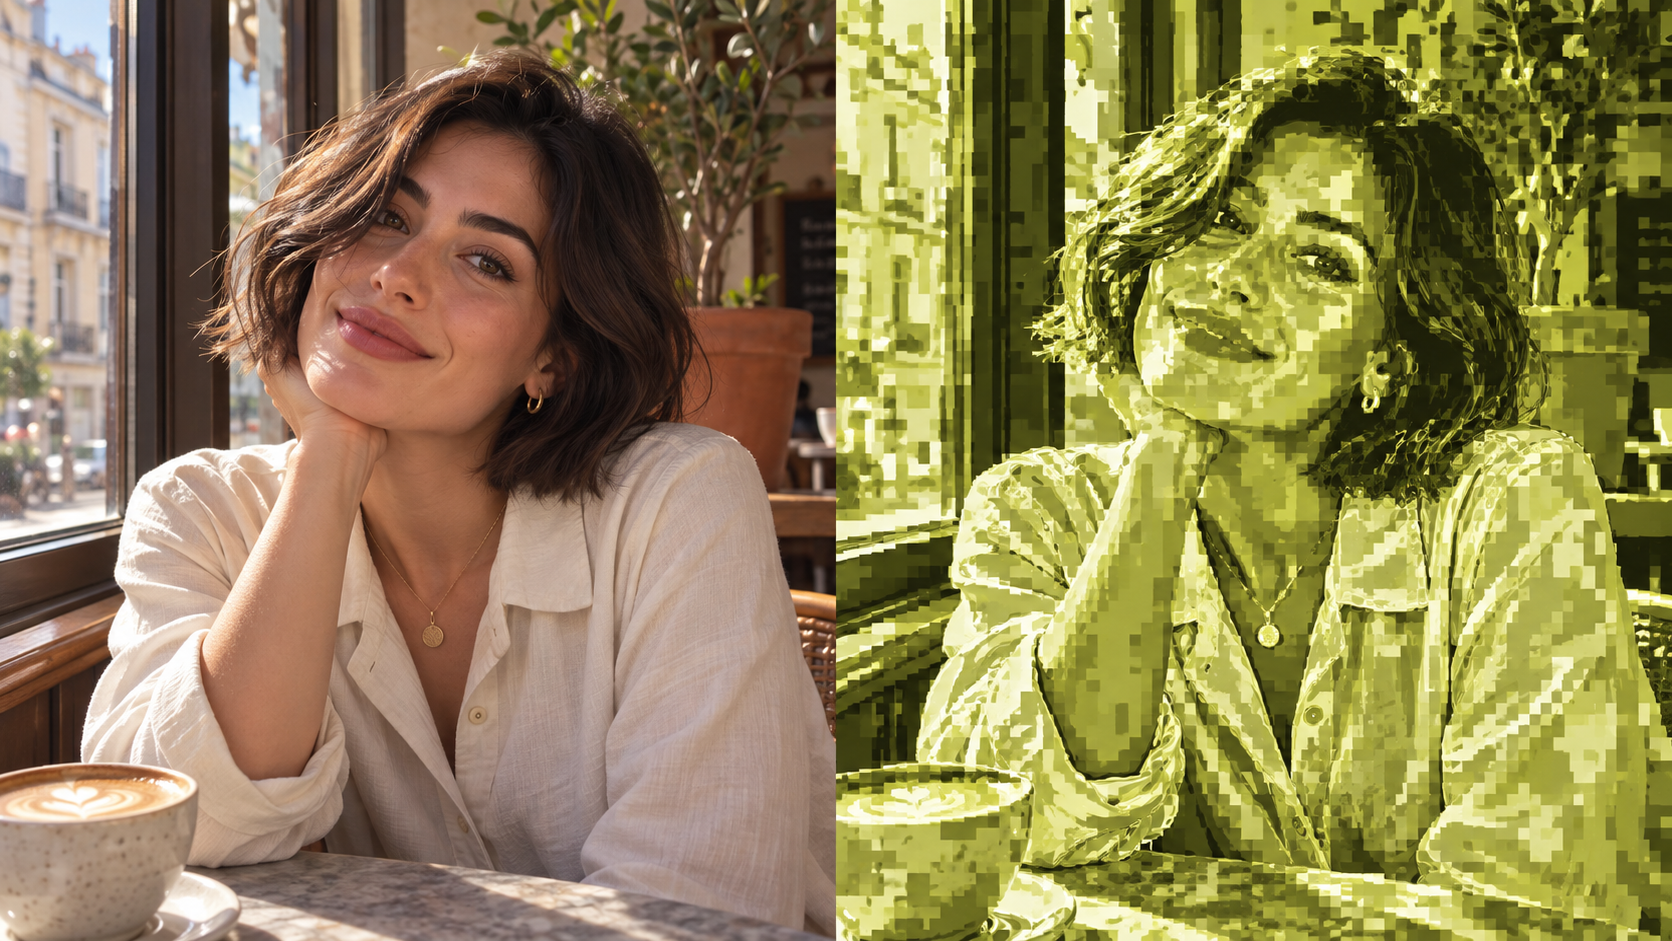
Matcha Trend Filter: before and after
Compare a natural portrait with a strongly pixelated yellow-green edit. The Matcha Trend Filter look uses coarse blocks, compressed colors, and liquid contours while keeping the pose and framing aligned.
AI-generated style demonstration. Actual edits vary with the source photo and instructions.
10 welcome credits · 5 credits per image · Still photos only
What is the Matcha Trend Filter look?
The Matcha Trend Filter combines a limited yellow-green palette with coarse pixel blocks and liquid-like distortion. Deep olive shadows, chartreuse midtones, and pale highlights turn continuous colors into distinct bands. Irregular mosaic patches replace fine texture, while glossy ripples follow facial contours, fabric folds, and background edges. It is a deliberately strong visual treatment that keeps broad composition recognizable while making the whole scene look heavily processed.
Our Matcha Trend Filter uses an AI image edit rather than a fixed color overlay. That means the model interprets the whole scene, including the face, fabric, background, and lighting. Two photos can produce different levels of texture, even with the same instructions. If you want a restrained result, ask for smaller blocks and less contour distortion; for a stronger treatment, request larger mosaic patches and brighter yellow-green highlights across the whole frame.
This page focuses on adding the effect. Start from an unfiltered copy when possible so you can compare the changes clearly. Keep your original file, because generating a second edit does not undo the first one. For a photo that already has a heavy green treatment, follow the linked removal guide or switch to the separate cleanup page.
A focused photo edit
What the Matcha Trend Filter adds to your photo
Style the photo you already like
Start with a clear portrait, an everyday scene, or a product photo. This AI interpretation of the matcha look is made for still images; it does not apply an official TikTok effect or animate a video.
Read: How to remove matcha filterKeep as the reference
- The visible subject and recognizable features
- Clothing, pose, objects, and overall framing
- The scene and composition you uploaded
Add to the finish
- Olive and yellow-green color grading
- Compressed color steps and coarse mosaic blocks
- Glossy liquid-like ripples along visible contours
Three simple steps
How to add the matcha trend filter
- 1
Upload a clear photo
Choose a JPG, PNG, or WebP up to 20 MB. A clear source gives the edit more visible detail to follow.
- 2
Apply the matcha filter
Sign in, keep Matcha Trend Filter selected, optionally describe a softer or stronger look, and choose Apply filter. The page selects this mode by default.
- 3
Compare and download
Review the generated photo beside your source. Check the face, clothing, and important details before saving your edit.
Photos to try with Matcha Trend Filter
Get a better Matcha Trend Filter result
Give the editor a clean source
Before using Matcha Trend Filter, choose the best available photo rather than a screenshot of a repost. Good exposure and a visible subject matter more than an elaborate background. Avoid layering the effect over multiple previous edits; accumulated blur and compression leave less detail for the model to follow.
Describe a specific finish
Use the optional instruction field to guide Matcha Trend Filter toward a clear visual choice: large yellow-green blocks, dark olive shadows, readable facial outlines, or stronger liquid contours. Describe one or two priorities in plain language. Conflicting requests for heavy distortion and exact texture preservation can make the outcome less predictable.
Compare mood and recognizable details
After Matcha Trend Filter finishes, review the image at normal viewing size and then inspect important details. Check whether the new palette suits the scene, whether the person or product remains recognizable, and whether small text changed. Download the version that supports your creative intent, and keep it alongside the unfiltered original.
Add the effect or remove an existing filter?
Choose Matcha Trend Filter when your goal is a green, stylized photo. Choose the dedicated remover when your source already has that effect and you want more neutral colors. The two pages start with different instructions, so choosing the right direction is more useful than trying to reverse the result through unrelated portrait settings.
For a controlled comparison, save separate copies and keep the same crop. Apply the look to one copy, inspect the result, and preserve the original as your reference. The tutorial below explains what happens when an exported filter has already replaced color or fine detail, and why a natural-looking reconstruction may differ from the original photograph.
Matcha trend filter questions
Already have a green-filtered photo?
Use the dedicated remover to reduce the color cast and work toward a more natural-looking image.